How to add photos to your website (the right way)
When you update your website, its likely you’ll be adding new photos every now and again. When it comes to uploading images, there are 4 things you need to keep an eye out for. They’re the biggest culprit when it comes to slow loading websites, so here is how to optimise your images so your website loads quickly (which is great for users, and Google).
Can’t I just add photos as they are to my website?
It probably sounds straight forward, uploading a picture to your website should be easy right?
Yes, it totally should be! But by double checking these could of things, you can seriously improve your SEO and the speed your website loads - which is a better experience for users AND good for Google.
The 4 key things to look out for when adding a photo to your website
File Size
If you take a photo on your iphone or camera, you will probably need to compress these photos - aka make the file size smaller. Aim for 200kb or less. You can use a tool like tinypng.com to help with this or make the image smaller e.g. 500x500pxs instead of 2000x2000pxs
File Type
The general rule of thumb is, if you have a photo it should be a JPG file as these have smaller file sizes. If you have an icon/graphic/logo or it has a transparent background then use a PNG as these ensure quality and transparency.
File Name
Your images are probably saved on your computer or phone with a string of random numbers. E.g. IMG1234.jpg or Wa5gjy.png . To make them better for Google, you want to save the images to include your target keyword or business name e.g. keyword-business.jpg . I also recommend using hyphens instead of spaces.
Not sure what the heck I’m talking about? Keywords who? Check out this blog post which provides a simple introduction to SEO.
Alt Description
When you upload your image to your website, be sure to add an alt-description. This describes the photo for people who use screen readers and describes it to Google, so its a good place to use your target keyword.
How do I add an alt-description on Squarespace?
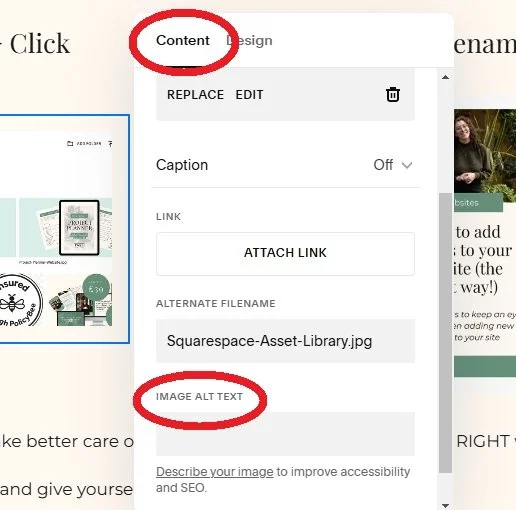
Whenever you add a photo in Squarespace you simply need to do to the edit button (the little pencil) to bring up the edit box. (See screenshot).
Then, simply click, content and scroll down to image alt text.
You then simply want to describe the image and try to include your keyword in there.
For example, if there is a picture of me at my desk, I might write an alt description along the lines of:
“Freya Padmore, website designer, building a Squarespace website while sat at desk.”
Its descriptive and includes my keyword “website designer” and “squarespace website”.
Where can I see my photo file size on Squarespace?
If you’ve already uploaded a bunch of photos to your website, you can double check their file names and file size by taking a look at your media library. Take a look at the screen shots below to see what I mean.
1- Go to Website > Assets > Click the 3 dots > Info
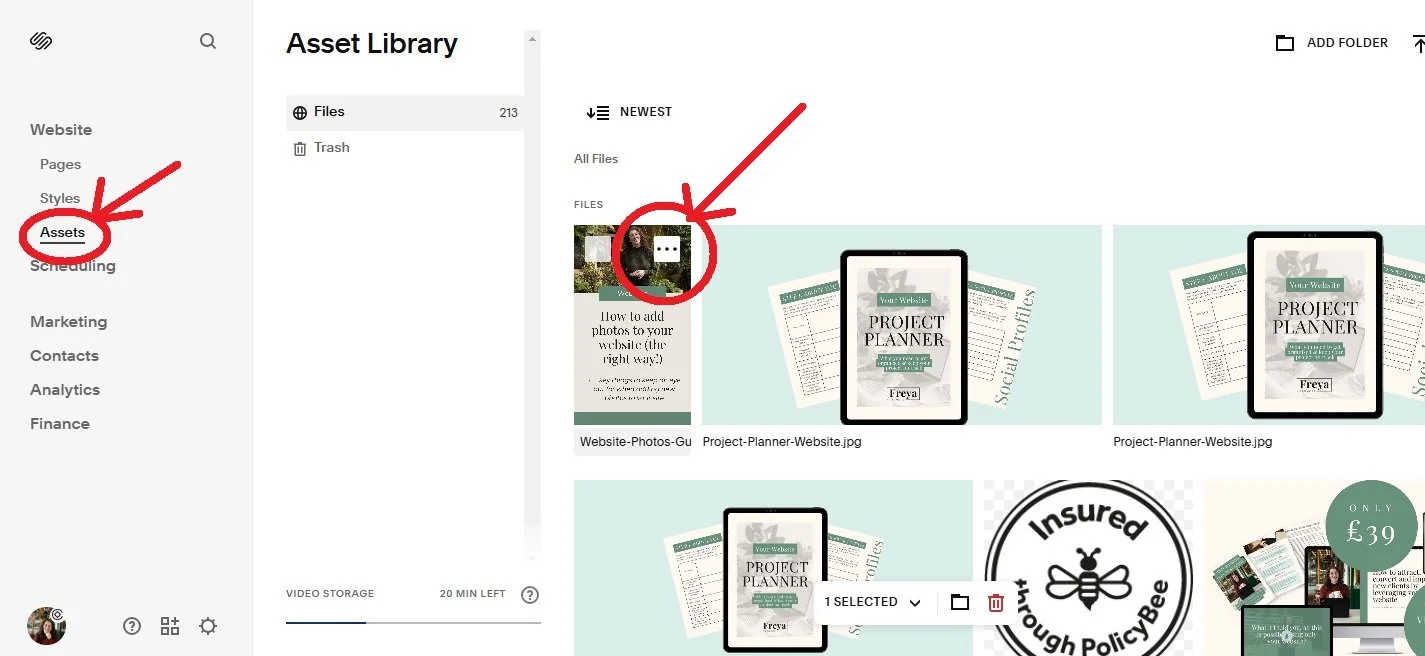
2- Check your Size and Filename

So there you have it - that’s how to take better care of your website and upload photos the RIGHT way.
Save yourself a slow loading website and give yourself some SEO juice.
Can’t be arsed to go through the faff yourself? Feel free to reach out about a full or half design day, where I will take all these things off your plate and get done in hours what would otherwise take you weeks.